How To Upload A Favicon To WordPress
We get this question a lot, and the answer is surprisingly easy! You can quickly learn to upload a favicon to WordPress without using external tools, plugins, or other third-party methods.
What is a favicon?
A website icon, or a favicon, is a small image that identifies a specific website or web page. Favicons are often displayed in a website browser’s address bar, tabs, or bookmark lists.
A favicon is a combination of “favorite” and “icon,” which initially made sense because when it was first introduced, it only appeared when you added a favorite to your bookmarks in your web browser.
Why have a site icon?
It would help if you had a favorite icon or site icon for a few reasons.
- Brand Awareness: They keep your website on brand and consistent to your viewers.
- Readability: They make your website easy to identify and read when multiple tabs are open in a website browser.
- Builds Credibility: Not only is it consistent for your brand, but the icon will sometimes show up in search results next to your website. This brings credibility to your brand vs other websites that don’t have one.
Does it help with SEO (Search engine optimization)
No, having the site icon on your site doesn’t help with SEO, but if you have one, Google does show the icon in search results next to your website results. This may make you stand out if you do a favicon vs not having one.
What favicon dimensions should I use?
WordPress recommends a square image with a minimum size of 512 x 512 pixels for your favicon dimensions. You can upload larger images; just make sure that they maintain the square ratio.
For image type, you’ll probably want to save your icon file as a logo or brand mark with a transparent background to work in both light and dark modes on computers. The typical image type for an image with a transparent background is a .png or .svg file.
How do I add a website icon to my WordPress Site?
Here are the four easy steps to add a WordPress icon to your website.
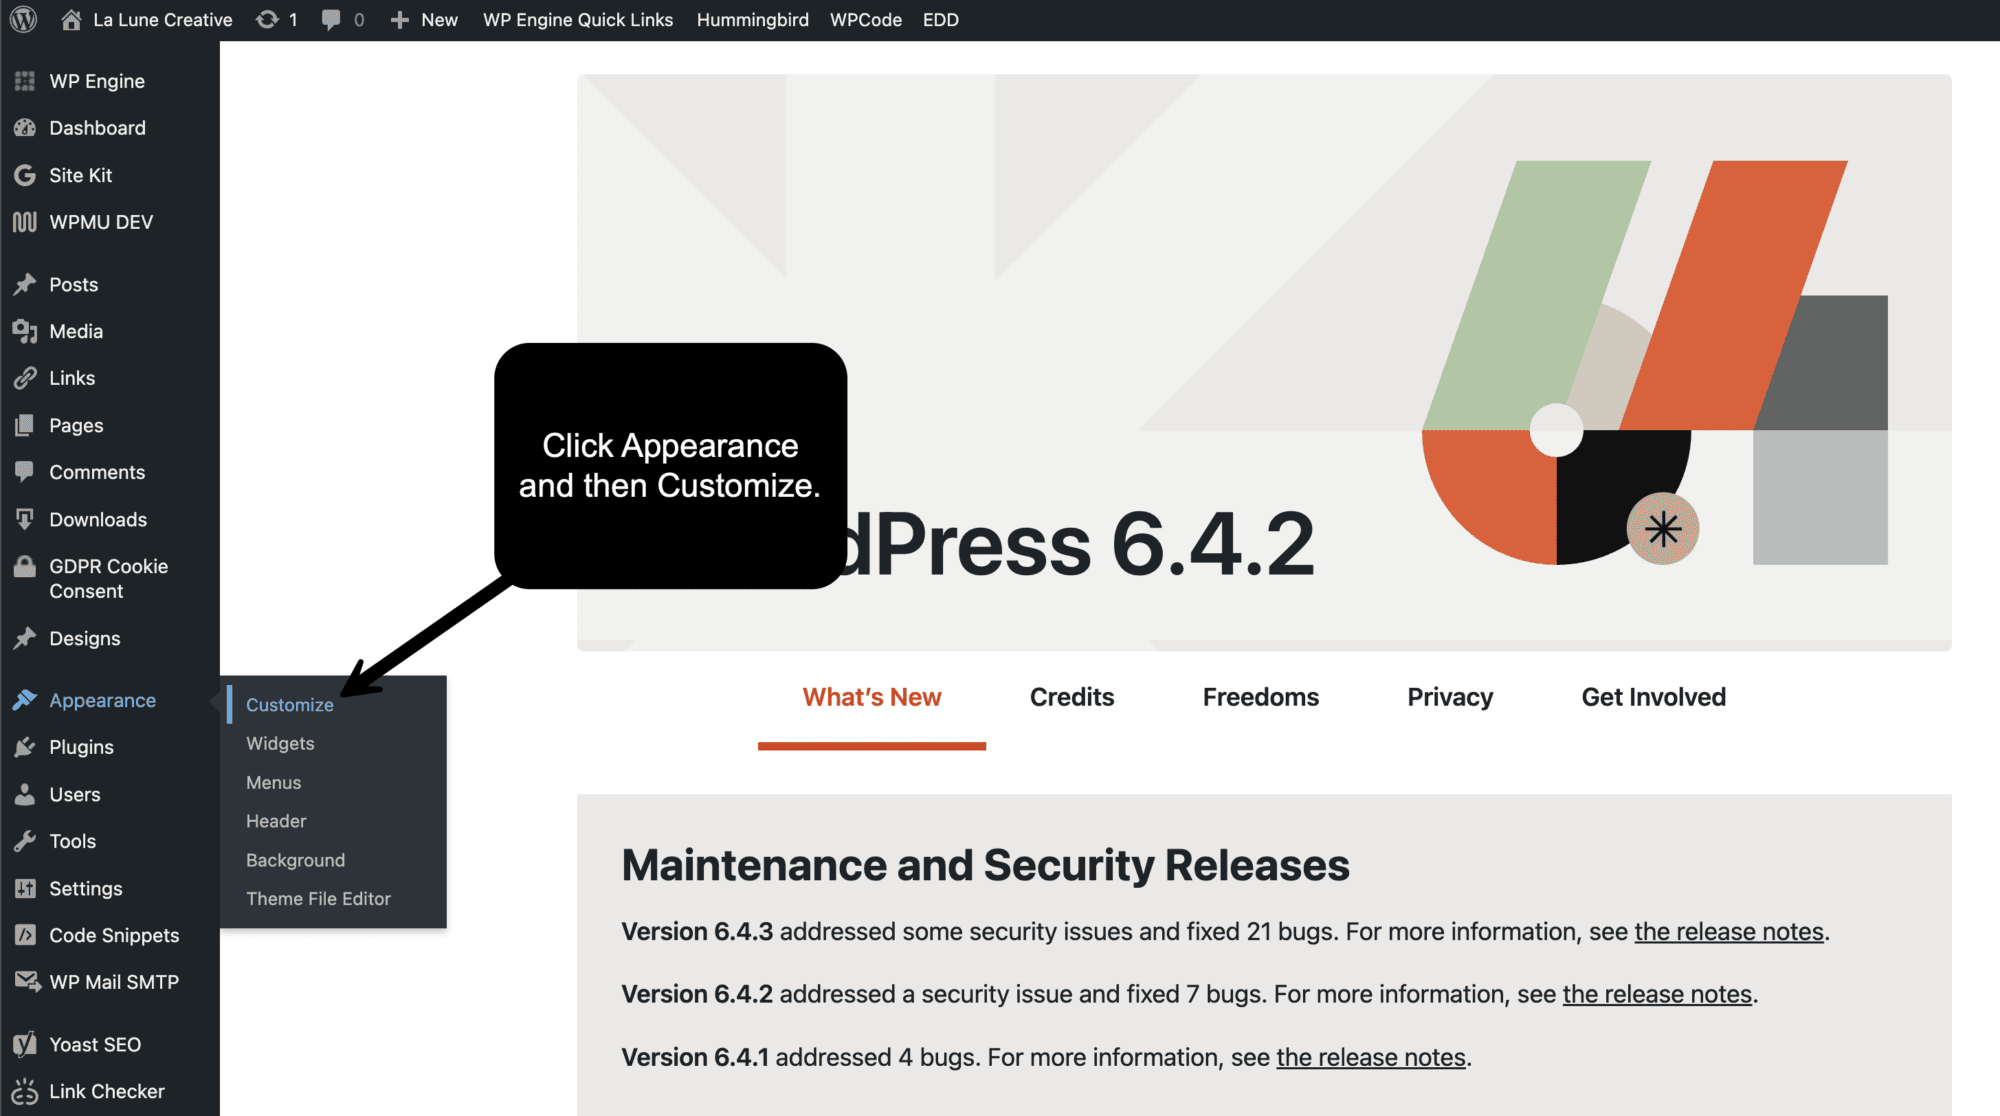
Step 1: In your WordPress dashboard, click “Appearance” and “Customize.”

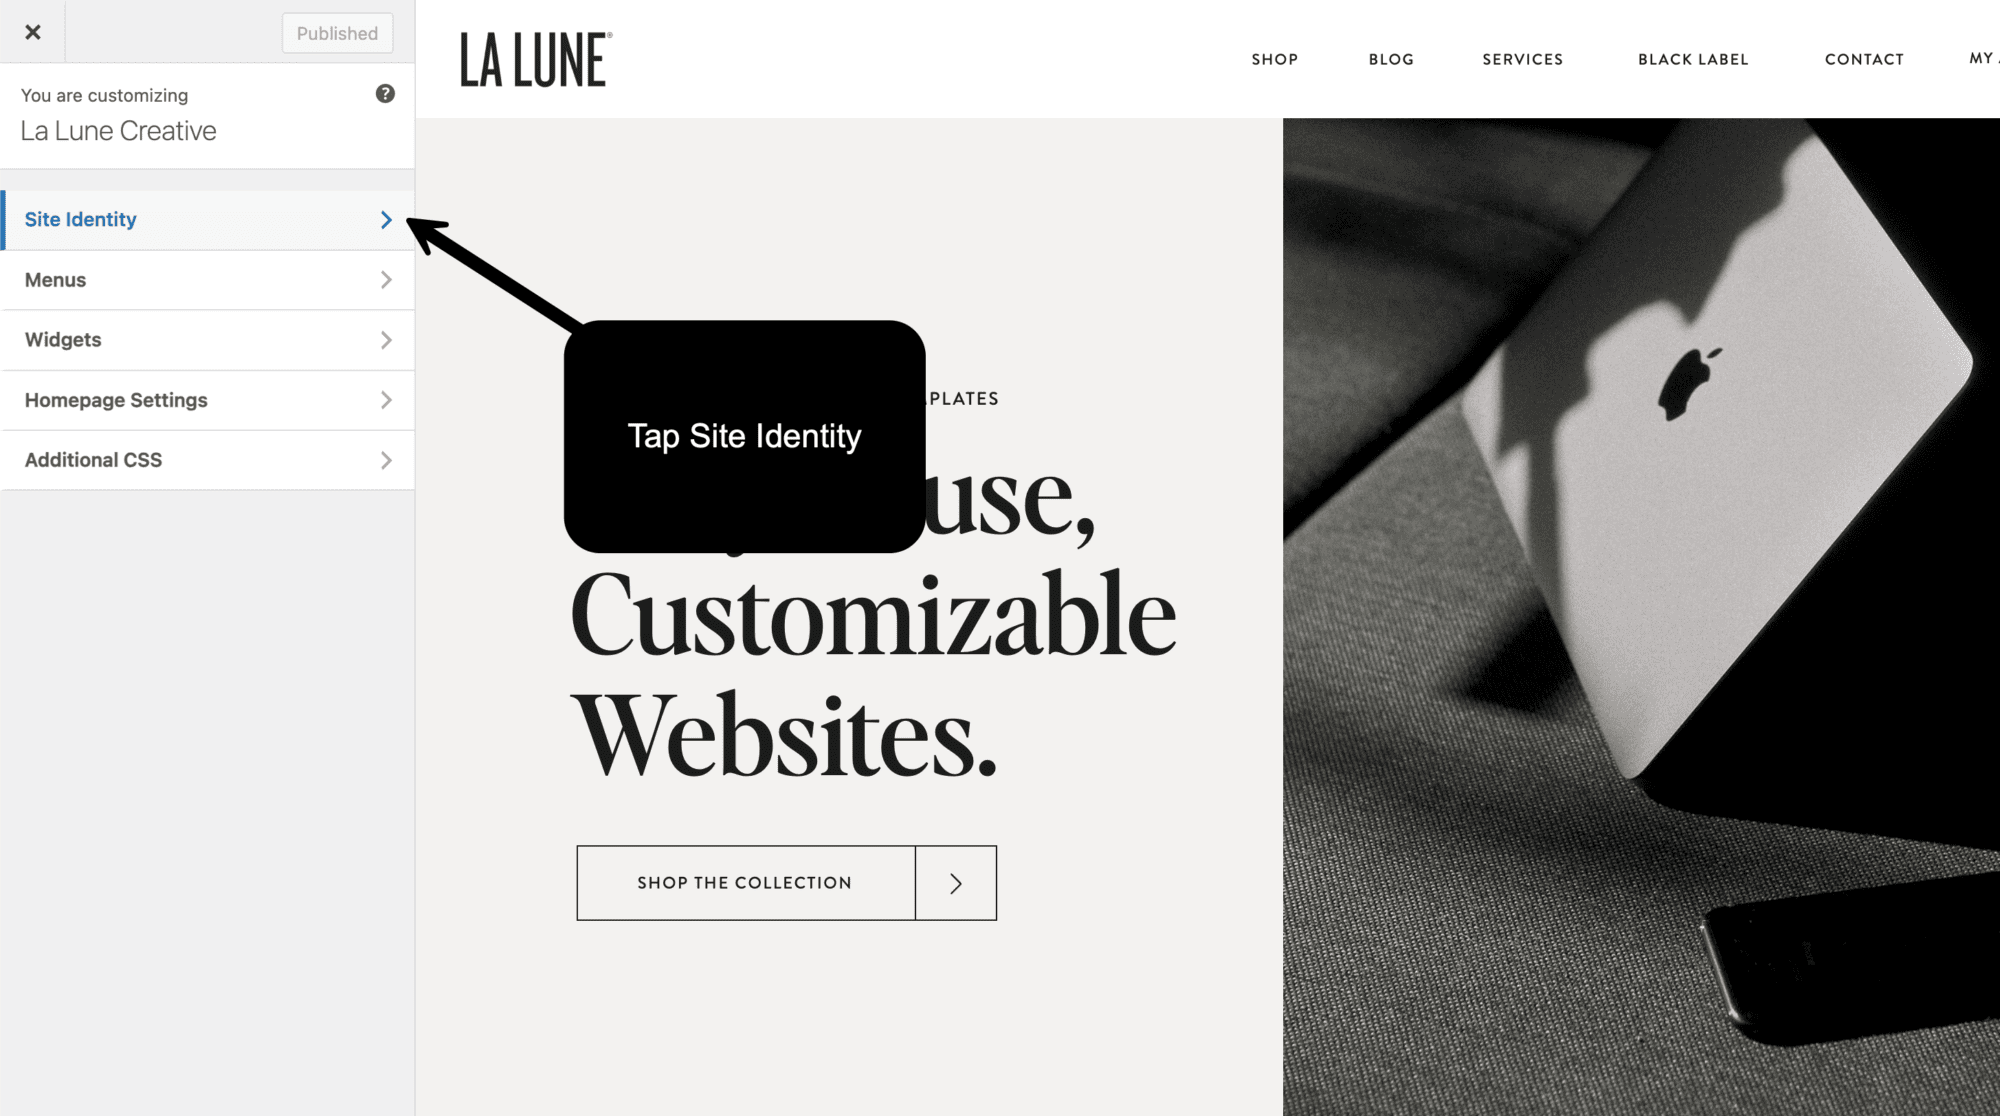
Step 2: Tap “Site Identity”.

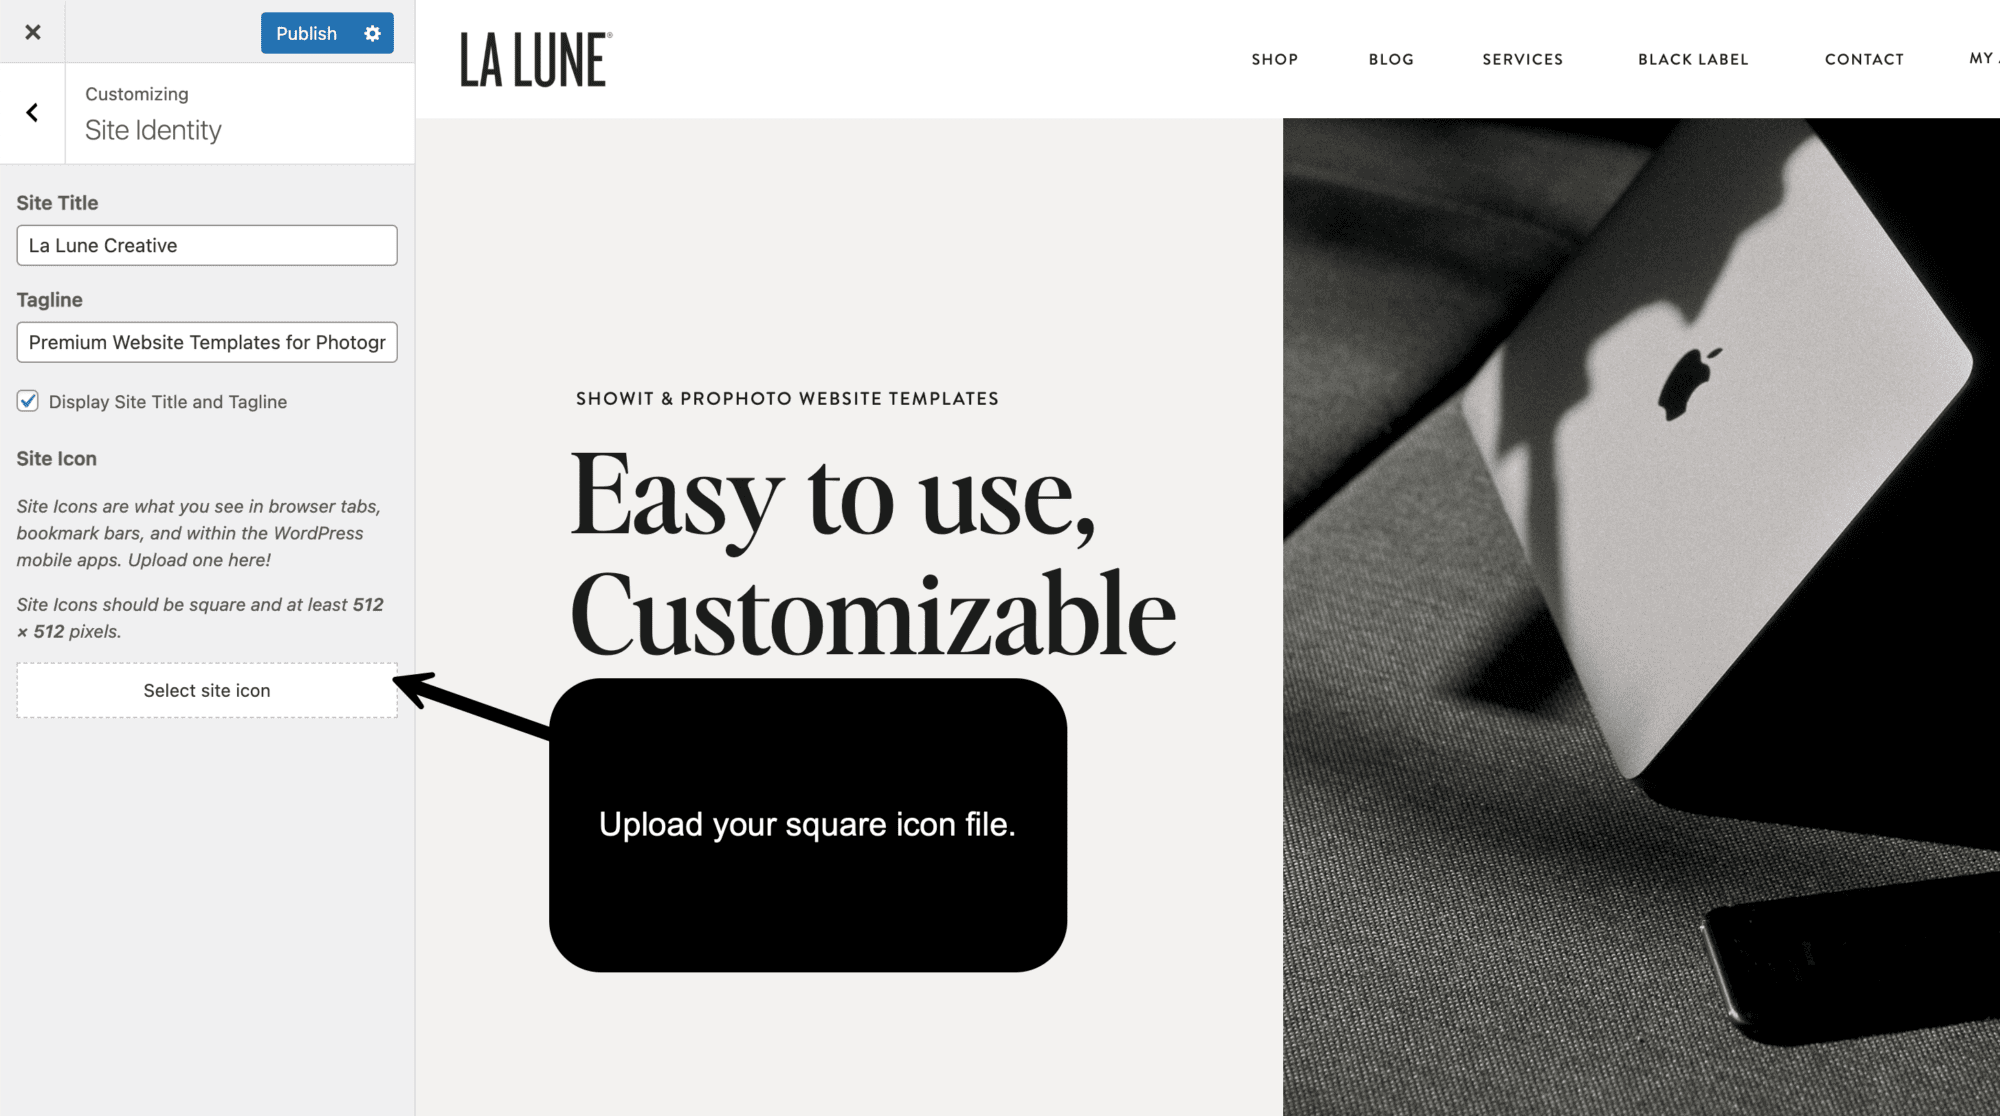
Step 3: Next, click “Select Site Icon” and upload your website favicon image.

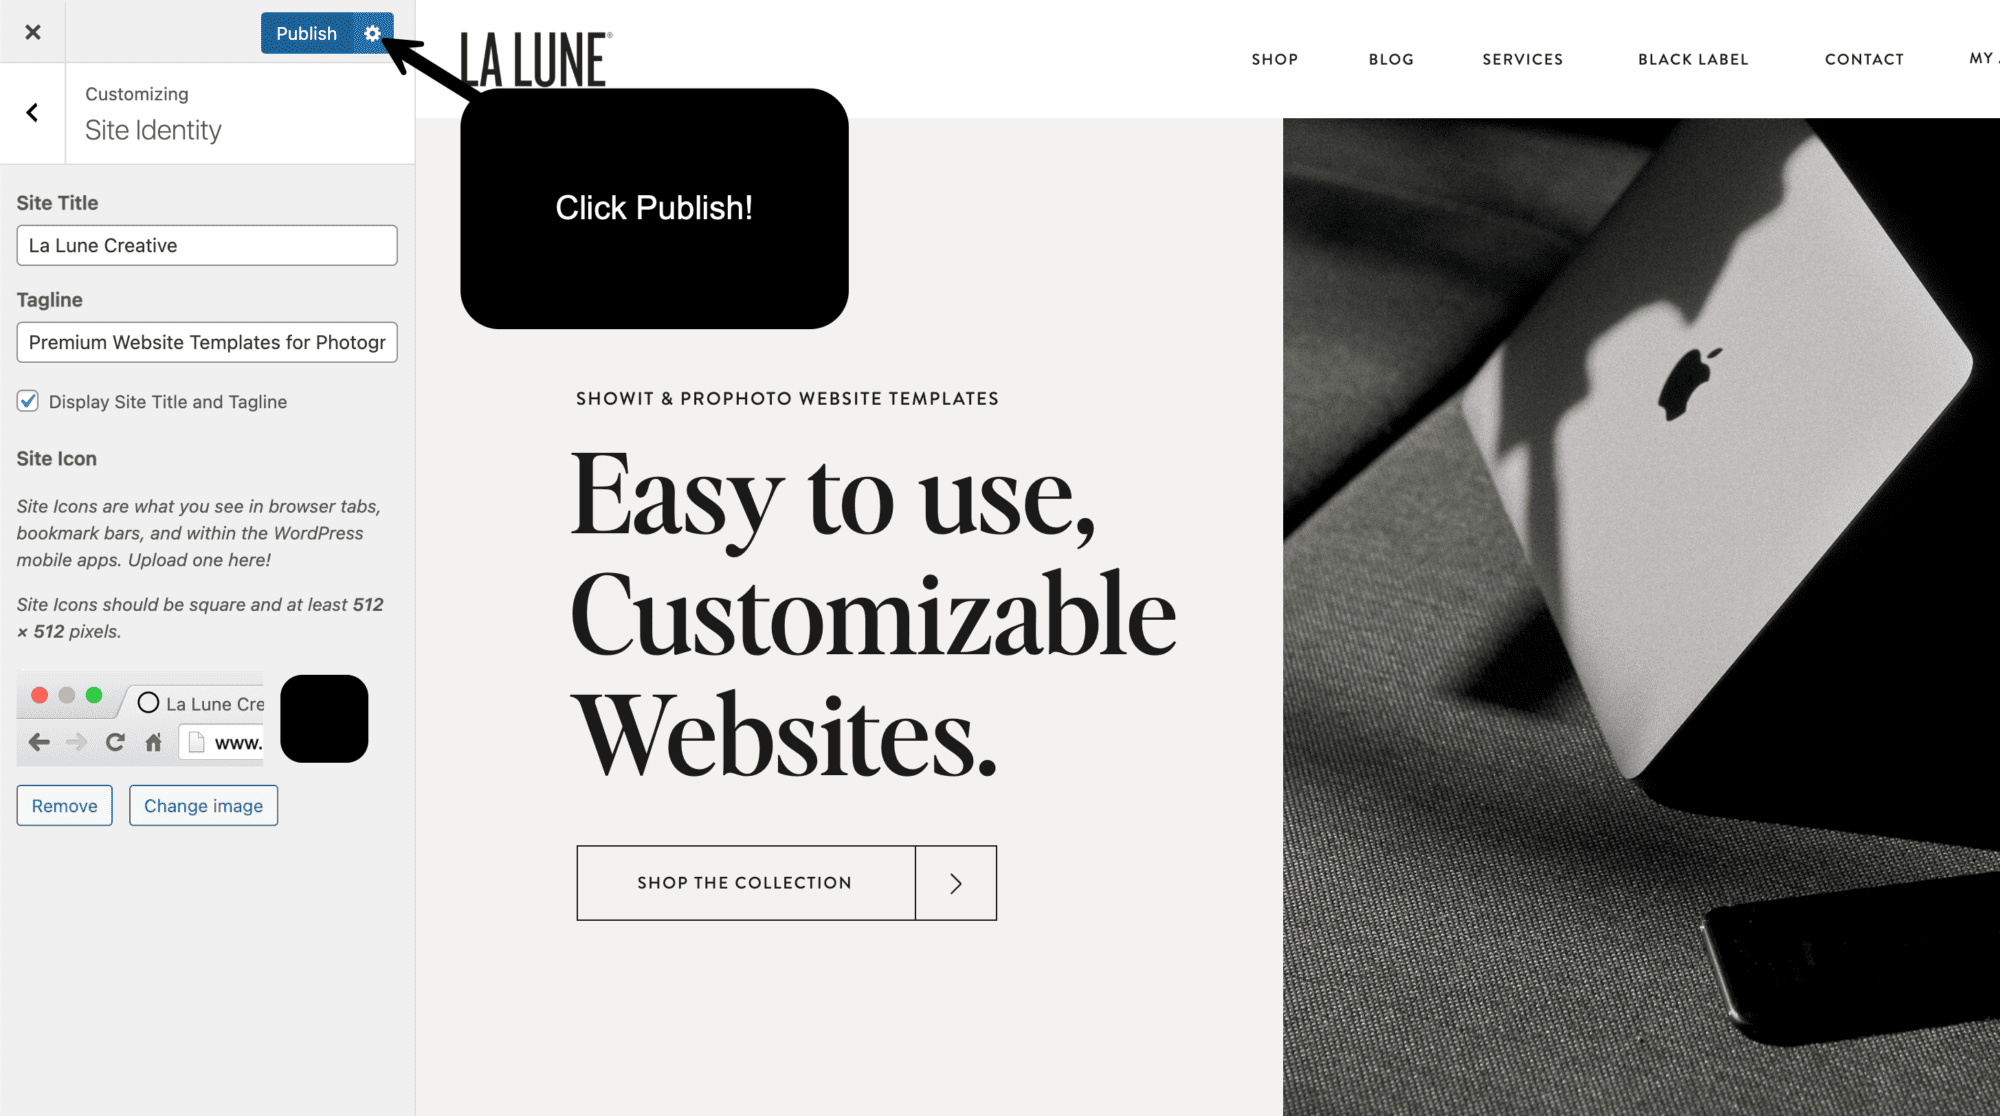
Step 4: Make sure to click “publish” when you’re done uploading.

That’s it! WordPress will do the rest for you. You should now see your beautiful new favicon next to your website browser tab when users add your site to their favorites. It may take some time to show up in Google search results.